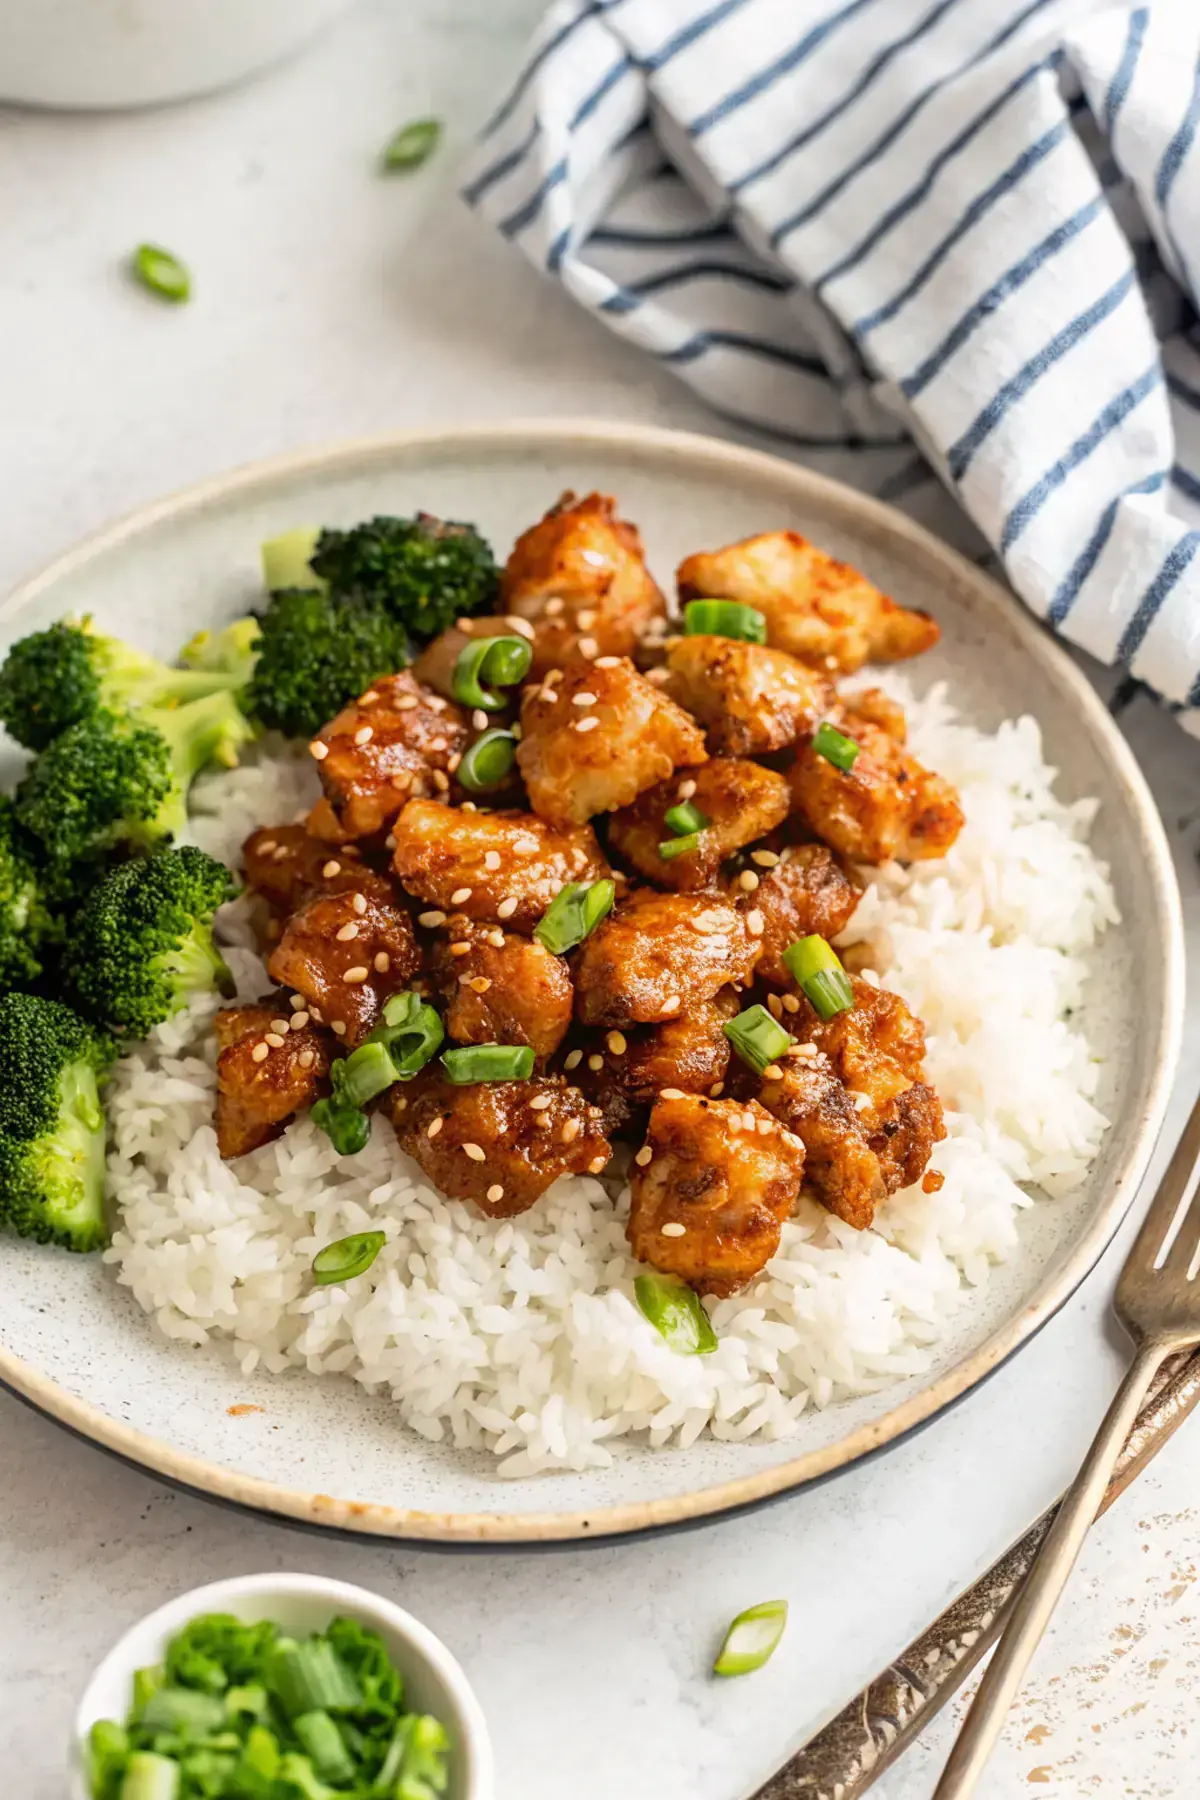
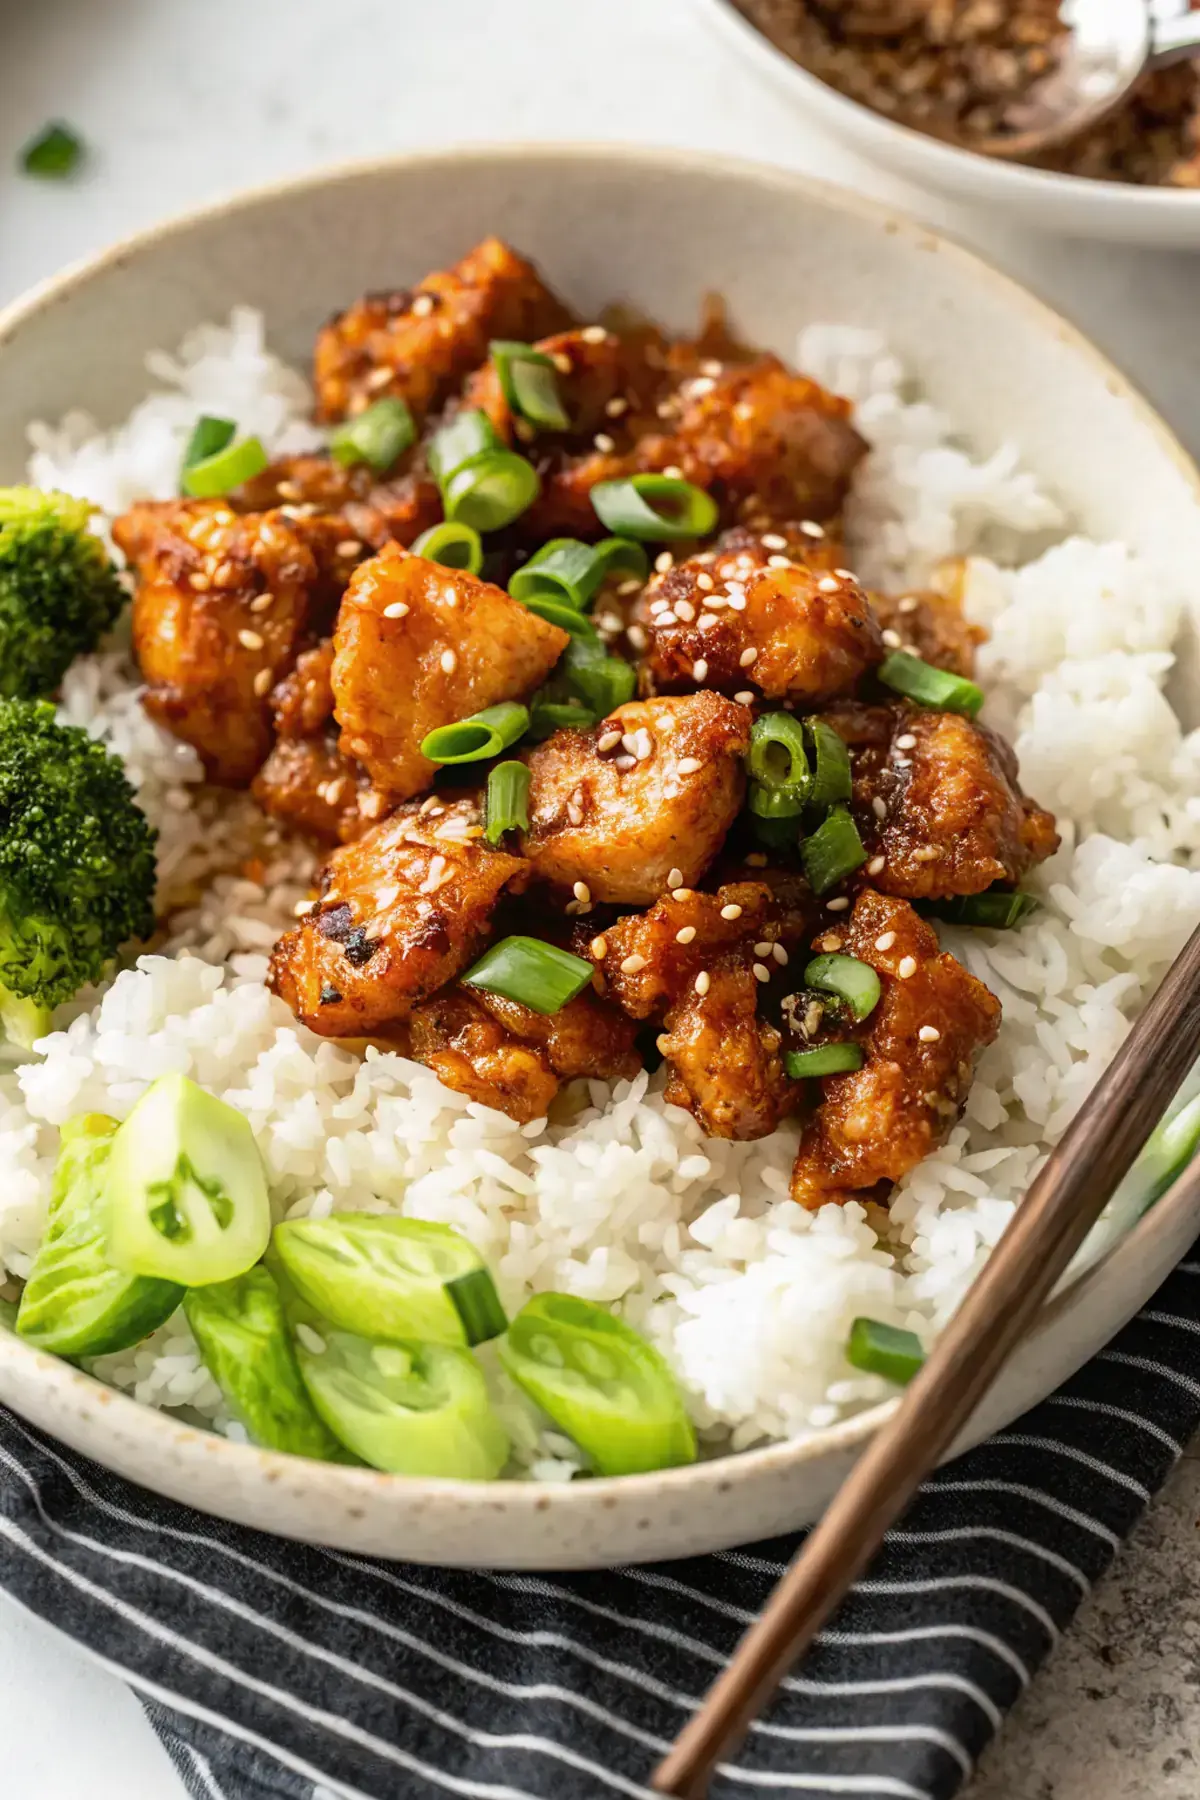
I love those evenings when I find myself pulling together a quick meal right before picking up the kids from school. With hungry little ones waiting, it’s crucial to have something delicious and satisfying on the table in no time. That’s where this crispy sesame chicken comes in—it’s not just quick, but also turns out golden and crispy, perfect for rewarding their post-school appetites.
Why You’ll Love This Crispy Sesame Chicken Recipe
This dish has become a staple in our household, and for good reason. It’s one of those recipes that strikes the perfect balance between convenience and deliciousness. As a busy mom, having a reliable recipe that the kids love is a game changer—especially when I can get everyone involved in the kitchen.
Whether it’s for a weekday dinner or a fun family gathering, this crispy sesame chicken is always a hit. The combination of flavors and textures makes it feel special without requiring hours of cooking.
What Makes this Recipe Unique
– **High-Quality Protein:** The boneless chicken breast not only provides lean protein but also stays juicy when cooked properly.
– **Crispy Coating:** The blend of cornstarch and flour results in a crispy texture that’s hard to resist.
– **Flavorful Sauce:** The sweet and tangy sauce made from brown sugar, soy sauce, and sesame oil brings everything together beautifully.
– **Family-Friendly:** With familiar ingredients and appealing flavors, this dish is designed to please even the pickiest of eaters.
Estimated Macros & Calories
This dish fits well into a balanced meal while ensuring you hit your protein goals.
(estimated per serving, without optional ingredients)
- Calories: 300
- Protein: 28 g
- Carbohydrates: 25 g
- Fat: 15 g
- Fiber: 1 g
The Most Authentic Crispy Sesame Chicken Recipe
Crispy sesame chicken is a delightful fusion of textures and flavors that brings a touch of Asian-inspired goodness to your family meals. The light, crunchy coating paired with the sweet and savory sauce is sure to create a memorable dining experience.
Ingredient Notes
– Chicken Breasts: This main ingredient is lean and packed with protein. It’s versatile, allowing the dish to remain both delicious and nutritious.
– Low-Sodium Soy Sauce: Used both in the marinade and sauce, this keeps the flavors rich without overwhelming saltiness.
– Brown Sugar: Provides a wonderful caramelization during cooking, enhancing flavors and giving a slight sweetness to the dish.
– Sesame Oil: Just a little goes a long way in adding a distinct, nutty aroma that elevates the dish.
– Cornstarch: Essential for achieving that perfect crispy texture; don’t leave it out during the dredging process!
Instructions
Step 1: Marinate the Chicken
Begin by putting the cut chicken in a bowl and adding the low-sodium soy sauce, beaten egg, salt, and pepper. Stir well until the pieces are evenly coated, then let it sit as you prepare the dry dredge for a better crust.
Step 2: Prepare the Dry Dredge
In a shallow dish, combine the cornstarch, flour, and baking powder. Toss in the marinated chicken a few pieces at a time, ensuring each piece is well coated before shaking off any excess and placing them on a wire rack.
Step 3: Mix the Sauce Ingredients
While the chicken rests, whisk together the brown sugar, soy sauce, rice vinegar, toasted sesame oil, grated ginger, and minced garlic. Don’t forget to mix the cornstarch slurry of one tablespoon cornstarch and three tablespoons water and set both aside.
Step 4: Fry the Chicken
Heat the oil in a deep skillet or Dutch oven, aiming for around 350°F. Fry the chicken in small batches, making sure to maintain the oil temperature for crispy results, cooking each batch until golden brown.
Step 5: Drain the Chicken
Use a slotted spoon to remove the fried chicken pieces, allowing them to drain briefly on a wire rack set over a baking sheet—this keeps them from becoming soggy.
Step 6: Simmer the Sauce
Pour the prepared sauce ingredients into a medium skillet over medium heat. Bring it to a gentle simmer and whisk in the cornstarch slurry, cooking until the sauce thickens into a glossy glaze.
Step 7: Coat the Chicken
Add the warm chicken to the sauce and toss gently over low heat, just enough to coat each piece with the glaze without compromising the crispy texture.
Step 8: Serve Immediately
Transfer your beautifully glazed crispy sesame chicken to a serving platter and top with toasted sesame seeds and sliced green onions before serving with your choice of steamed rice or stir-fried vegetables.
Tips and Mistakes to Avoid
– Always let the coated chicken rest before frying; this helps the coating stick better.
– Don’t overcrowd the pan when frying; it can lower the oil temperature and result in soggy chicken.
– If you prefer a thicker glaze, add a bit more cornstarch to the slurry and adjust to your taste.
Storage Tips
– Store leftovers in an airtight container in the fridge for up to three days.
– For longer storage, freeze cooked chicken in a single layer, then transfer to a freezer bag.
– To reheat, warm in a skillet over low heat to maintain crispiness, adding a splash of water if necessary to steam without softening.
Variations and Substitutions
– Try using chicken thighs for a juicier texture, or opt for tofu for a vegetarian-friendly version that still packs a protein punch.
– For a lower-carb option, you could substitute the brown sugar with a sugar alternative that caramelizes well.
Why This Recipe Is The Real Deal
What sets this crispy sesame chicken apart is its ability to deliver flavor and texture without any complicated steps. I appreciate how the ingredients come together to form a dish that everyone in my family looks forward to.
With its high protein content and crispiness, this meal checks all the boxes for satisfying hunger and providing nourishment.
The Bottom Line
This crispy sesame chicken is bound to become a family favorite with its perfect balance of simplicity and taste. I invite you to give it a try and leave a comment about how it turned out for you. Happy cooking!
Daisy Hartmann, RDN
Founder of GoProteinEats.com
Making high-protein eating simple, delicious, and sustainable for real life.
Crispy Sesame Chicken Recipe
Ingredients
Chicken & Marinade
- 1.5 lb boneless skinless chicken breasts, cut into 1" pieces
- 1 tbsp low-sodium soy sauce (for marinade)
- 1 large egg, beaten
- 1/2 tsp fine salt
- 1/4 tsp freshly ground black pepper
Coating
- 3/4 cup cornstarch
- 1/4 cup all-purpose flour
- 1/2 tsp baking powder
Sauce
- 1/3 cup light brown sugar, packed
- 3 tbsp low-sodium soy sauce (for sauce)
- 1 tbsp rice vinegar
- 1 tsp toasted sesame oil
- 1 tbsp fresh ginger, finely grated
- 1 clove garlic, minced
- 1 tbsp cornstarch (for slurry) mix with 3 tbsp water
- 1/4 cup water
Frying & Garnish
- 2 cup neutral oil (vegetable or canola) for frying amount may vary depending on pan
- 1 tbsp toasted sesame seeds
- 2 tbsp green onions, thinly sliced
Instructions
Preparation Steps
- Put the cut chicken in a bowl and stir in 1 tablespoon soy sauce, beaten egg, salt, and pepper. Mix until pieces are evenly coated and let sit while you prepare the dry dredge (5–10 minutes).
- In a shallow dish combine the cornstarch, flour, and baking powder. Toss the marinated chicken in the dry mixture a few pieces at a time so each piece is well coated; shake off excess and place on a wire rack. Let the coated chicken rest 10 minutes — this helps the coating adhere and crisp up when fried.
- While the chicken rests, whisk together the sauce ingredients: brown sugar, 3 tablespoons soy sauce, rice vinegar, sesame oil, grated ginger and minced garlic in a small bowl. Mix the cornstarch slurry (1 tablespoon cornstarch with 3 tablespoons water) and set both aside.
- Heat oil in a deep skillet or Dutch oven to 350°F (use a thermometer if available) — you want enough oil to allow the chicken to float while frying. Fry the chicken in 2–3 small batches so the oil temperature recovers quickly. Cook each batch 3–4 minutes until golden and crisp, turning once.
- Remove fried pieces with a slotted spoon and drain briefly on a wire rack set over a baking sheet (avoid paper towels so crispness is maintained). Keep cooked pieces warm in a 200°F oven if desired while finishing remaining batches.
- Pour the prepared sauce into a medium skillet over medium heat. Bring to a gentle simmer, then whisk in the cornstarch slurry. Cook, stirring, until the sauce thickens to a glossy glaze (about 1 minute). Taste and adjust: add a pinch of salt or a splash of rice vinegar if you prefer tangier notes.
- Add the warm fried chicken to the skillet with the glaze. Toss quickly and gently over low heat so each piece gets an even, sticky coating without softening the crust — 30–60 seconds is enough.
- Transfer to a serving platter, sprinkle with toasted sesame seeds and sliced green onions, and serve immediately with steamed rice or stir-fried vegetables.